Homemade Cookie Dough Ice Cream: Bake Your Flour for Safety!
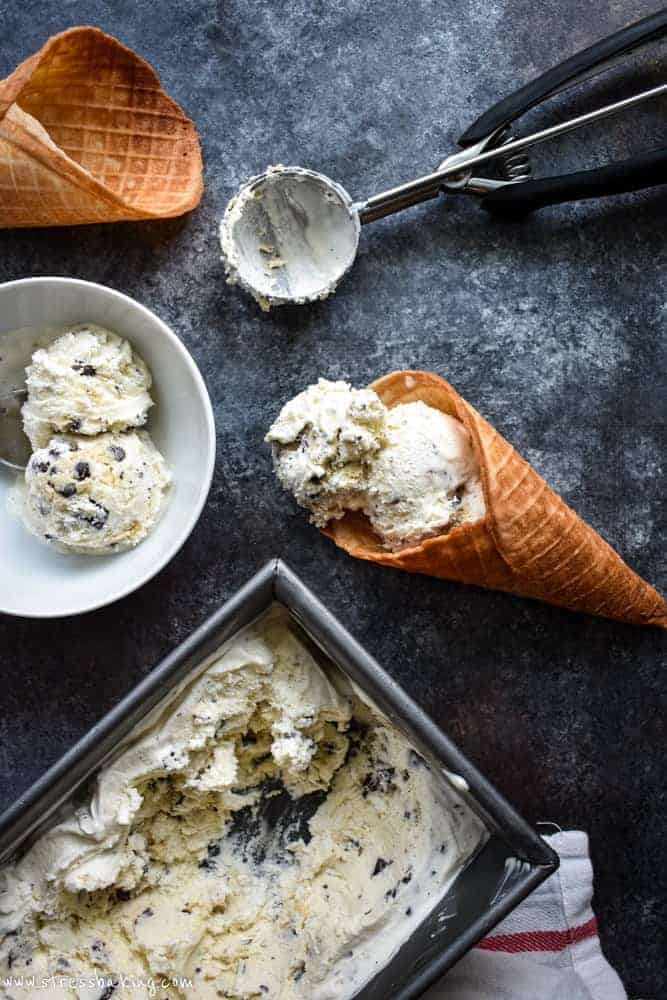
There are few desserts as universally beloved and nostalgically comforting as chocolate chip cookie dough ice cream. The creamy, cold embrace of vanilla ice cream, studded with generous chunks of soft, sweet cookie dough and a scattering of mini chocolate chips – it's a symphony of textures and flavors that transports you straight back to childhood. While store-bought versions certainly hit the spot, there's an unparalleled magic that comes with crafting this delight from scratch in your own kitchen. It's richer, creamier, and undeniably fresher, offering that "pause-after-the-first-bite" satisfaction that truly declares, "Yep, this is the one."
Making your own
homemade chocolate chip cookie dough ice cream allows you to control the quality of every ingredient, from the depth of the vanilla to the size of your cookie dough chunks. But beyond customization and superior taste, there's a crucial safety step that often goes overlooked in the excitement of creation: properly preparing your flour. This article will guide you through creating the ultimate churned cookie dough ice cream, ensuring every scoop is not only delicious but also perfectly safe to enjoy.
Why Homemade Chocolate Chip Cookie Dough Ice Cream Reigns Supreme
The difference between a mass-produced tub of ice cream and a batch made with care in your kitchen is night and day. When you make
chocolate chip cookie dough ice cream at home, you unlock a level of flavor and texture that simply can't be replicated.
Firstly, freshness is key. You're using real dairy, high-quality vanilla, and freshly made cookie dough, free from preservatives or artificial flavors. This results in an incredibly rich and authentic taste that allows the true essence of vanilla and the buttery sweetness of the cookie dough to shine through. The texture, too, is superior. Homemade ice cream, especially when made with an ice cream maker, achieves a smoothness and creaminess that resists becoming icy, offering that perfect scoopable consistency.
Secondly, customization is at your fingertips. Do you prefer larger chunks of cookie dough? More chocolate chips? A hint of sea salt? When it's homemade, you dictate the ratios and ingredients. It transforms a simple dessert into a personalized culinary experience, making it an ideal project for a relaxed weekend afternoon, a special summer gathering, or a make-ahead treat that never lasts long in the freezer. It’s the kind of recipe that embodies both familiarity and something truly special, without requiring an overwhelming amount of hands-on work.
The Essential Safety Step: Baking Your Flour
Before you even think about mixing your cookie dough, there's a vital, often-missed step that ensures your homemade
chocolate chip cookie dough ice cream is completely safe to eat: baking your flour. While we often associate foodborne illness with raw eggs, raw flour can also pose a significant health risk. Flour, being a raw agricultural product, can sometimes contain harmful bacteria like E. coli, which is killed during the baking process when making cookies or cakes, but remains active in raw dough.
To eliminate this risk, you need to heat-treat your all-purpose flour before incorporating it into your cookie dough. The process is simple and takes just a few minutes:
1.
Spread it out: Take the amount of all-purpose flour required for your cookie dough and spread it in an even, thin layer on a small, rimmed baking sheet.
2.
Bake: Place the baking sheet in a preheated oven at 350°F (175°C) for approximately 5 minutes. The goal is for the flour to reach an internal temperature of 160°F (71°C), which is hot enough to kill any potential bacteria. You can use a food thermometer to check this, but 5 minutes is generally sufficient.
3.
Cool completely: Once baked, remove the flour from the oven and let it cool completely to room temperature before using it in your cookie dough recipe. This prevents it from melting your butter or cooking other ingredients.
This small but critical step ensures that your delectable cookie dough pieces are safe to consume raw, allowing you to enjoy your
homemade chocolate chip cookie dough ice cream without any worries.
Crafting the Perfect Cookie Dough: The Heart of Your Ice Cream
The star of any
chocolate chip cookie dough ice cream is, of course, the cookie dough itself. Achieving that perfect balance of chewy, soft, and sweet dough is crucial. The cookie dough for ice cream differs slightly from baking dough, as it needs to remain soft when frozen.
Our recipe calls for simple, wholesome ingredients to create this irresistible element:
- Melted Butter: This provides that classic, rich cookie dough flavor and helps keep the dough pliable even when frozen solid.
- Brown Sugar: Essential for its molasses notes and soft texture. Brown sugar contributes to the chewiness and moisture of the dough, making it a delight to bite into.
- Heat-Treated All-Purpose Flour: As discussed, this gives the dough its structure and ensures it holds together beautifully, now safely prepared.
- Vanilla Extract: A splash of vanilla deepens the flavor profile, complementing the brown sugar and butter.
- Mini Chocolate Chips: While regular chocolate chips work, mini chips are often preferred as they distribute more evenly throughout the dough and ice cream, ensuring chocolatey goodness in every bite. Semi-sweet chips work best to balance the sweetness of the ice cream and dough.
Once your dough is mixed, a crucial tip for optimal texture in your finished ice cream is to freeze the dough pieces *before* adding them to the churned ice cream. After forming small, irregular chunks, spread them on a parchment-lined baking sheet and freeze for at least 30 minutes. This pre-freezing prevents them from melting into the ice cream base during churning, ensuring they remain distinct, delightful chunks.
Building the Creamy Base: Your Ice Cream Foundation
The foundation of exceptional
homemade chocolate chip cookie dough ice cream is a rich, creamy base. There are two primary styles of ice cream base: custard-style and Philadelphia-style. Both yield delicious results, but with distinct characteristics. For a deeper dive into these methods, explore our guide on
Custard vs. Philadelphia: Perfect Homemade Cookie Dough Ice Cream.
The recipe we're highlighting here often leans towards a simplified, yet incredibly rich, Philadelphia-style base, which means it’s made without eggs. This method bypasses the tempering and cooking of a custard, making the process more straightforward without compromising on creaminess.
Our base relies on a harmonious blend of:
- Heavy Cream and Whole Milk: The backbone of the ice cream. Using both creates a perfect balance – the heavy cream provides luxurious richness, while the whole milk keeps the texture from becoming too heavy, resulting in a delightfully scoopable treat.
- Granulated Sugar: Not just for sweetness, sugar also plays a vital role in the ice cream's texture, helping it churn smoothly and remain less icy.
- A Pinch of Salt: A small amount of salt enhances all the other flavors, balancing the sweetness and adding depth.
- Vanilla Bean and Vanilla Extract: For the ultimate vanilla flavor, a combination of both is often recommended. The vanilla bean infuses a complex, full-bodied vanilla essence, while the extract rounds it out with familiar warmth. If a vanilla bean isn't available, high-quality vanilla extract alone will still create a wonderful base.
The preparation for the base is simple: whisk together your ingredients, often warming them slightly to dissolve the sugar completely, and then chill the mixture thoroughly. This chilling step is absolutely essential; a cold base churns more efficiently, resulting in a smoother, creamier ice cream. Plan several hours ahead for this, ideally overnight, to ensure your base is perfectly chilled.
Churning Your Way to Perfection
Once your cookie dough is pre-frozen and your ice cream base is thoroughly chilled, it’s time for the magic of the ice cream maker. Pour the cold base into your machine and churn according to the manufacturer's instructions. As the mixture thickens and approaches a soft-serve consistency (usually in 20-30 minutes), it's time to add your prepared cookie dough chunks. Incorporating them towards the end ensures they are evenly distributed without being broken down too much.
After churning, the ice cream will be soft. For a firmer, more scoopable texture, transfer it to an airtight container and freeze for at least 4-6 hours, or ideally overnight. For the best serving experience, let your
homemade chocolate chip cookie dough ice cream soften slightly at room temperature for about 5-10 minutes before scooping. This brief thaw enhances its creamy texture and makes it much easier to serve.
Pro Tips for Next-Level Homemade Cookie Dough Ice Cream
To elevate your
chocolate chip cookie dough ice cream from great to extraordinary, consider these insider tips:
*
Quality Ingredients Matter: Since the ingredient list is relatively short, opt for the best quality heavy cream, whole milk, and vanilla you can find. A good quality butter also makes a noticeable difference in the cookie dough's flavor.
*
Don't Skimp on Chilling: Both the ice cream base and the cookie dough benefit immensely from proper chilling and freezing. Patience here will be rewarded with superior texture.
*
Experiment with Mix-ins: While chocolate chips are classic, feel free to get creative! Swirl in some caramel, add chopped nuts, or even a different type of chocolate. Just ensure any additions are appropriate for freezing. For more ideas on achieving the perfect balance of textures, check out our guide on
Creamy & Chunky: Your Guide to Homemade Cookie Dough Ice Cream.
*
Storage Savvy: Store your finished ice cream in a shallow, airtight container. Press a piece of parchment paper directly onto the surface of the ice cream before sealing to prevent ice crystals from forming, keeping your treat fresh and creamy for longer.
*
Consider a Stand Mixer for Dough: While hand-mixing works, a stand mixer with a paddle attachment can make quick work of combining your cookie dough ingredients, ensuring everything is thoroughly incorporated.
Conclusion
Crafting your own
homemade chocolate chip cookie dough ice cream is a truly rewarding experience, offering a depth of flavor and freshness that store-bought versions can rarely match. By following these steps, especially the crucial safety measure of baking your flour, you can create a safe, delicious, and absolutely irresistible dessert that will become a staple in your home. So gather your ingredients, fire up your ice cream maker, and prepare to indulge in the creamiest, chunkiest, and safest cookie dough ice cream you've ever tasted. It’s more than just a dessert; it’s a moment of pure, homemade bliss.