Creamy & Chunky: Your Ultimate Guide to Homemade Chocolate Chip Cookie Dough Ice Cream
Few desserts evoke pure joy quite like a scoop of homemade chocolate chip cookie dough ice cream. That perfect marriage of silken, vanilla-infused creaminess, studded with generous, chewy chunks of cookie dough and scattered mini chocolate chips, is an experience unparalleled. Forget the store-bought versions – once you master making this incredible treat yourself, you'll understand why the homemade distinction is so crucial. It’s an indulgence that makes you pause, savoring every delightful bite, thinking, "Yep, this is the one."
Making your own chocolate chip cookie dough ice cream recipe might seem like a grand undertaking, but it's surprisingly accessible. Whether you own an ice cream maker or prefer a no-churn method, the reward is an incredibly rich, deeply flavorful dessert that truly captures the essence of raw cookie dough – safe and utterly delicious. This isn't just ice cream; it's a nostalgic journey in a bowl, a testament to simple ingredients coming together to create something extraordinary.
The Heart of Your Homemade Treat: The Ice Cream Base
The foundation of any great ice cream is its base, and for the best chocolate chip cookie dough ice cream, this holds true. There are two primary styles of homemade ice cream bases: the rich, egg-yolk-driven custard style and the lighter, egg-free Philadelphia style. Each offers a unique texture and flavor profile, letting you tailor your ice cream to your exact preference.
Custard-Style: Unparalleled Richness from Egg Yolks
For those who crave a truly traditional, old-school ice cream experience, a custard base made with egg yolks is non-negotiable. While you *can* make ice cream without them, the difference egg yolks make is profound. The fat and protein present in the yolks are secret weapons, contributing significantly to:
- Unmatched Creaminess: Egg yolks emulsify beautifully, creating an incredibly smooth, luxurious texture that melts exquisitely on the tongue.
- Improved Body and Structure: They add substance and a richer mouthfeel, preventing the ice cream from feeling thin or watery.
- Superior Flavor: Yolks impart a subtle richness that enhances the overall vanilla and cookie dough flavors, making the ice cream taste more complex and satisfying.
- Anti-Icing Properties: Critically, egg yolks help the ice cream stay smooth in the freezer, preventing the formation of ice crystals that can turn your treat gritty.
If you're after that deep, intense creaminess that defines classic homemade ice cream, venturing into a custard base is highly recommended. It involves a tempering step, gently cooking the eggs with the dairy to create a perfectly silken base.
Philadelphia-Style: Simple, Clean & Pure Vanilla
Alternatively, the Philadelphia-style ice cream offers a simpler, yet still incredibly delicious, approach. This base is made without eggs, making the process less hands-on with no tempering or cooking a custard involved. It relies on a balanced blend of dairy and sugar to achieve its creamy texture, allowing the chocolate chip cookie dough flavor to truly shine without any eggy undertones. The base ingredients are straightforward:
- Heavy Cream and Whole Milk: These form the backbone, providing richness without being overly heavy. The combination ensures a smooth texture that's indulgent yet refreshing.
- Sugar and a Pinch of Salt: Sugar not only sweetens but also helps create a smoother texture during churning. Salt balances the sweetness and enhances all the other flavors.
- Vanilla Bean and Vanilla Extract: Using both offers a multi-layered vanilla experience. The bean contributes deep, warm notes and often those coveted black flecks, while the extract rounds out the flavor profile.
A Philadelphia-style base often results in an ice cream that feels a touch lighter than its custard counterpart, though it remains wonderfully rich and scoopable once it's had a moment to soften. For a deeper dive into these styles, explore our article: Custard vs. Philadelphia: Perfect Homemade Cookie Dough Ice Cream.
Crafting the Irresistible Cookie Dough Chunks: The "Chunky" Secret
The undeniable stars of homemade chocolate chip cookie dough ice cream are those delightful, chewy pieces of cookie dough. To ensure they remain distinct and delicious, rather than melting into the ice cream or turning rock-hard, a few key steps are essential.
Safety First: Heat-Treated Flour is a Must!
Before you even think about mixing your dough, there's a crucial safety step: heat-treating your flour. Raw flour can contain bacteria, so it's vital to eliminate any potential risk. The good news is, it's incredibly simple:
- Spread your all-purpose flour in an even layer on a small baking sheet.
- Bake at 350°F (175°C) for just 5 minutes, or until it reaches an internal temperature of 160°F (71°C).
- Let it cool completely before incorporating it into your cookie dough mixture.
This quick step ensures your edible cookie dough is perfectly safe to consume. Learn more about this vital process in our guide: Homemade Cookie Dough Ice Cream: Bake Your Flour for Safety!
The Perfect Cookie Dough Composition
Once your flour is safe, crafting the dough is straightforward:
- Melted Butter and Brown Sugar: These create the quintessential cookie dough flavor and contribute to its wonderfully soft texture, even when frozen. Brown sugar adds moisture and a characteristic molasses note that's crucial.
- Heat-Treated All-Purpose Flour: Provides the necessary structure to hold the dough together.
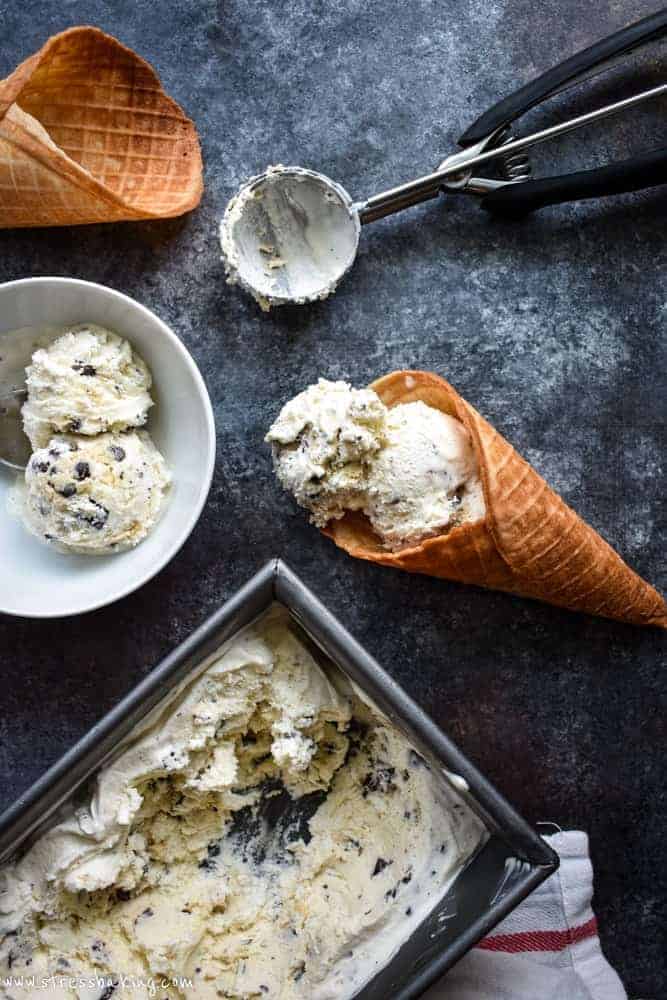
- Chocolate Chips: Mini semi-sweet chocolate chips are often preferred as they distribute more evenly and offer a balanced sweetness against the rich dough and ice cream. Their smaller size ensures you get chocolate in every bite without overwhelming the cookie dough.
After mixing, the key to truly chunky pieces is to roll the dough into a log or press it flat, then freeze it briefly before chopping. This firms it up, making it easier to cut into uniform pieces that hold their shape when folded into the churning ice cream.
Churning, Freezing, and Serving Your Dream Dessert
With your ice cream base chilled and your cookie dough prepared, it's time for the final, magical steps.
The Churning Process
For the smoothest, creamiest texture, a dedicated ice cream maker is highly recommended. The constant churning introduces air and prevents large ice crystals from forming. Remember these tips:
- Pre-Chill Your Base: Ensure your ice cream base is thoroughly chilled (at least 4 hours, preferably overnight) before churning. A cold base churns faster and produces a better texture.
- Follow Manufacturer Instructions: Every ice cream maker is slightly different. Adhere to your specific model's instructions for optimal results.
- Add Dough at the End: Incorporate your frozen, chopped cookie dough chunks during the last few minutes of churning. This ensures they are evenly distributed throughout the soft-serve consistency ice cream without being broken down too much.
While a no-churn method can produce a delicious result, the churned version typically offers a superior, velvety smoothness that many traditionalists prefer for classic chocolate chip cookie dough ice cream.
Freezing and Perfect Scoopability
After churning, your ice cream will be the consistency of soft-serve. Transfer it to an airtight container and freeze for at least 4-6 hours (or overnight) to allow it to firm up properly. This crucial step lets the flavors fully meld and the texture stabilize.
For the best serving experience, let your creamy chocolate chip cookie dough ice cream soften for 5-10 minutes at room temperature before scooping. This brief thaw makes it much easier to scoop and significantly improves its texture, allowing that beautiful creaminess to shine through.
Beyond the Basics: Tips for Success & Delicious Variations
Elevate your homemade chocolate chip cookie dough ice cream even further with these insights:
- Quality Ingredients Matter: Use high-quality dairy, pure vanilla extract, and good chocolate chips. The difference in flavor is noticeable.
- Don't Rush the Chill: Patience during the chilling phases (both the base and the final freeze) is key to the best texture.
- Experiment with Chocolate: While semi-sweet is classic, try milk chocolate chips for a sweeter profile, or dark chocolate for a richer, more intense contrast.
- Add a Swirl: For an extra layer of decadence, swirl in some caramel sauce or hot fudge during the last few minutes of churning or when layering into your freezer container.
- Vary Your Mix-ins: Consider adding other edible cookie dough flavors (peanut butter, brownie batter), chopped nuts, or even a sprinkle of sea salt flakes when serving to enhance the flavors.
- Storage: Store homemade ice cream in a shallow, airtight container pressed with plastic wrap directly against the surface to minimize ice crystal formation and keep it fresh for up to two weeks.
Indulge in Homemade Perfection
Making your own chocolate chip cookie dough ice cream is more than just a recipe; it's a delightful weekend project, a crowd-pleasing dessert for any gathering, and an incredibly satisfying treat for yourself. From the rich, vanilla-infused base to the perfectly chewy, safe-to-eat cookie dough pieces, every element comes together to create a dessert that is truly irresistible. So, gather your ingredients, fire up your ice cream maker (or prepare for the no-churn magic), and get ready to create the creamiest, chunkiest, most delicious chocolate chip cookie dough ice cream you've ever tasted. Your taste buds will thank you!
